

If you want to test Windows 11 features in preview, the way to do it is by signing up for the Windows Insider Program. This is the method Microsoft has been using for nearly ten years to test new features ahead of general availability, and it’s a fun way to get a glimpse into the future of Windows 11.
But even though Windows Insiders sign up to test the latest features, not everything Microsoft is working on always becomes available right away. Many times, features are hidden inside Windows builds, but they can be found through the use of feature IDs, which are stored in the Windows Feature Store.
Windows 11: Everything you need to know
Windows 11 is official, and here’s what we know about the release date, new features on the way, and everything else about it.
Understanding the Windows Feature Store
Let’s start with the basics: a “feature” refers to a UI or capability change in Windows. As mentioned earlier, the A/B feature experiment mechanism found in Windows 10 and newer is controlled by the Windows Feature Store. This store (internally referred to as “Velocity”) is part of the mostly undocumented Windows Notification Facility (WNF), a kernel component used to dispatch notifications across the system, including other kernel components, system services, and user-space applications.
This modular approach to new features allows Microsoft to control the rollout of new changes. For instance, the Windows Insider Program is used to deliver work-in-progress functionalities to earlier updates, which are later patched incrementally and subsequently enabled for every user once it reaches the stability milestone. In case a particular feature contains a catastrophic bug or has a security flaw, it can be seamlessly disabled by the kernel.

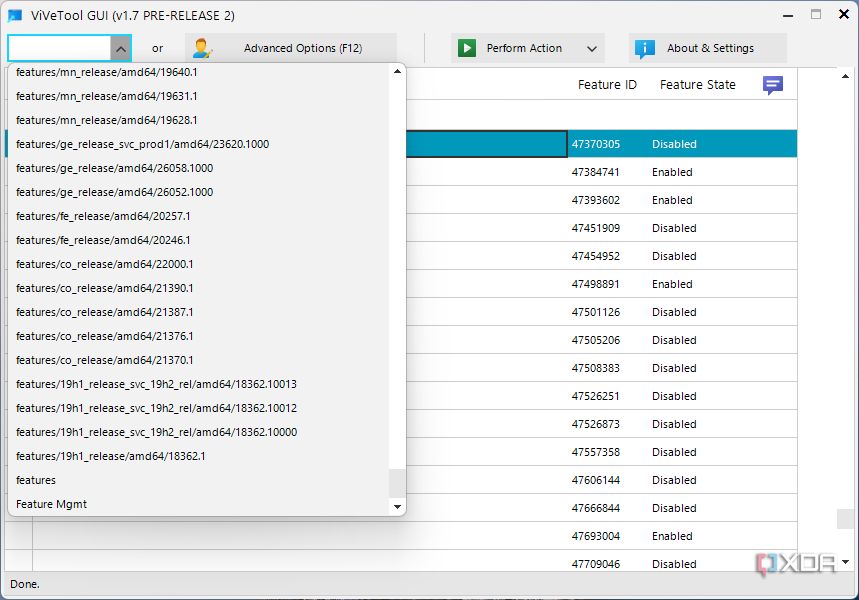
Each feature in the Windows Feature Store has a unique ID, and the developer of Mach2 (a sort of precursor to ViVeTool) maintains a list of feature IDs for each Insider build. The repo also contains the changes between builds, which can be useful for identifying new hidden features. Here’s a look at the states. You’ll be using ViVeTool to change these states.
To gain access to the Windows Feature Store, you can use apps like ViVeTool by Lucas (aka thebookisclosed) and bypass the server-side A/B testing altogether.
Tinkering with feature IDs can lead to instability or crashes. Because of interdependencies, some might break the core OS modules and make Windows entirely unusable.Some feature IDs may also make permanent changes that you can’t revert. Proceed at your own risk. It’s highly recommended to backup your data before making changes. Alternatively, you can
use a virtual machine
for testing.
If you’re not comfortable using command-line-based tools or you prefer something you can use with your mouse, ViVeTool GUI is a new project based on the original ViVeTool release, giving you a way to use its features without needing as much setup. Since it’s maintained by a separate developer, it may not be supported in the same way, but for now, it’s a good, user-friendly way to go about this.
- Open the ViveTool GUI GitHub page in your web browser of choice and download the latest release.
- Launch the installer and follow the steps with the default settings.
- Once the app is installed, launch it.
- In the Select Build dropdown on the top left, select the build you have installed.
- Allow the list to populate. It could take a few minutes.
- Search for the feature ID for a specific feature you want to enable. As an example, 44774629 is for Windows Copilot.
If you’re looking for a specific feature to enable, you can choose the Manually change a feature option instead. You can enter the feature ID you want and choose the status you want to set for it.
- Press the Perform Action button and choose Activate Feature.
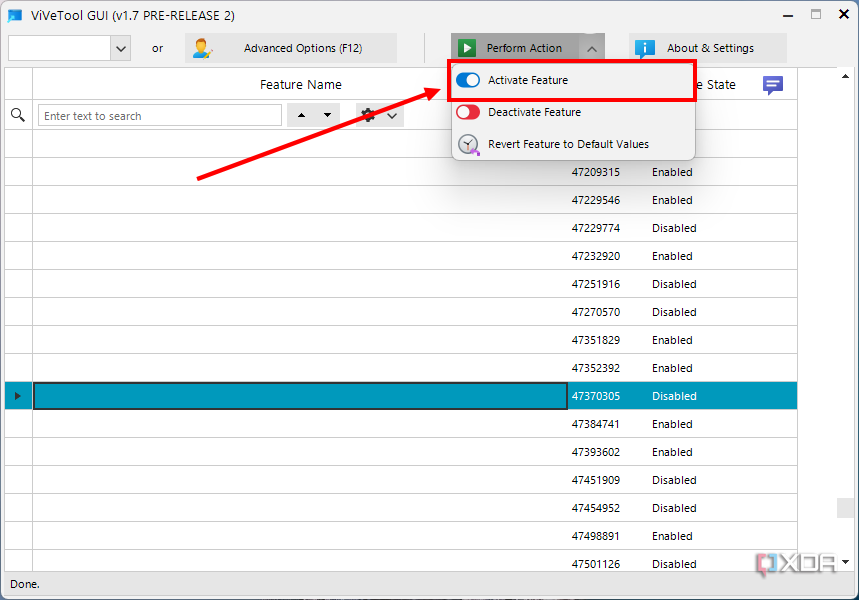
- Once you’re done, you can close the app.


You may have to restart your PC to have the change apply.
The original version of ViVeTool is designed to run in a command-line interface, and while it may not be the most user-friendly approach, it’s still quite easy to use. Here’s how it works:
- Download the latest version of ViVeTool from its GitHub repository.
- Extract the archive to somewhere convenient.
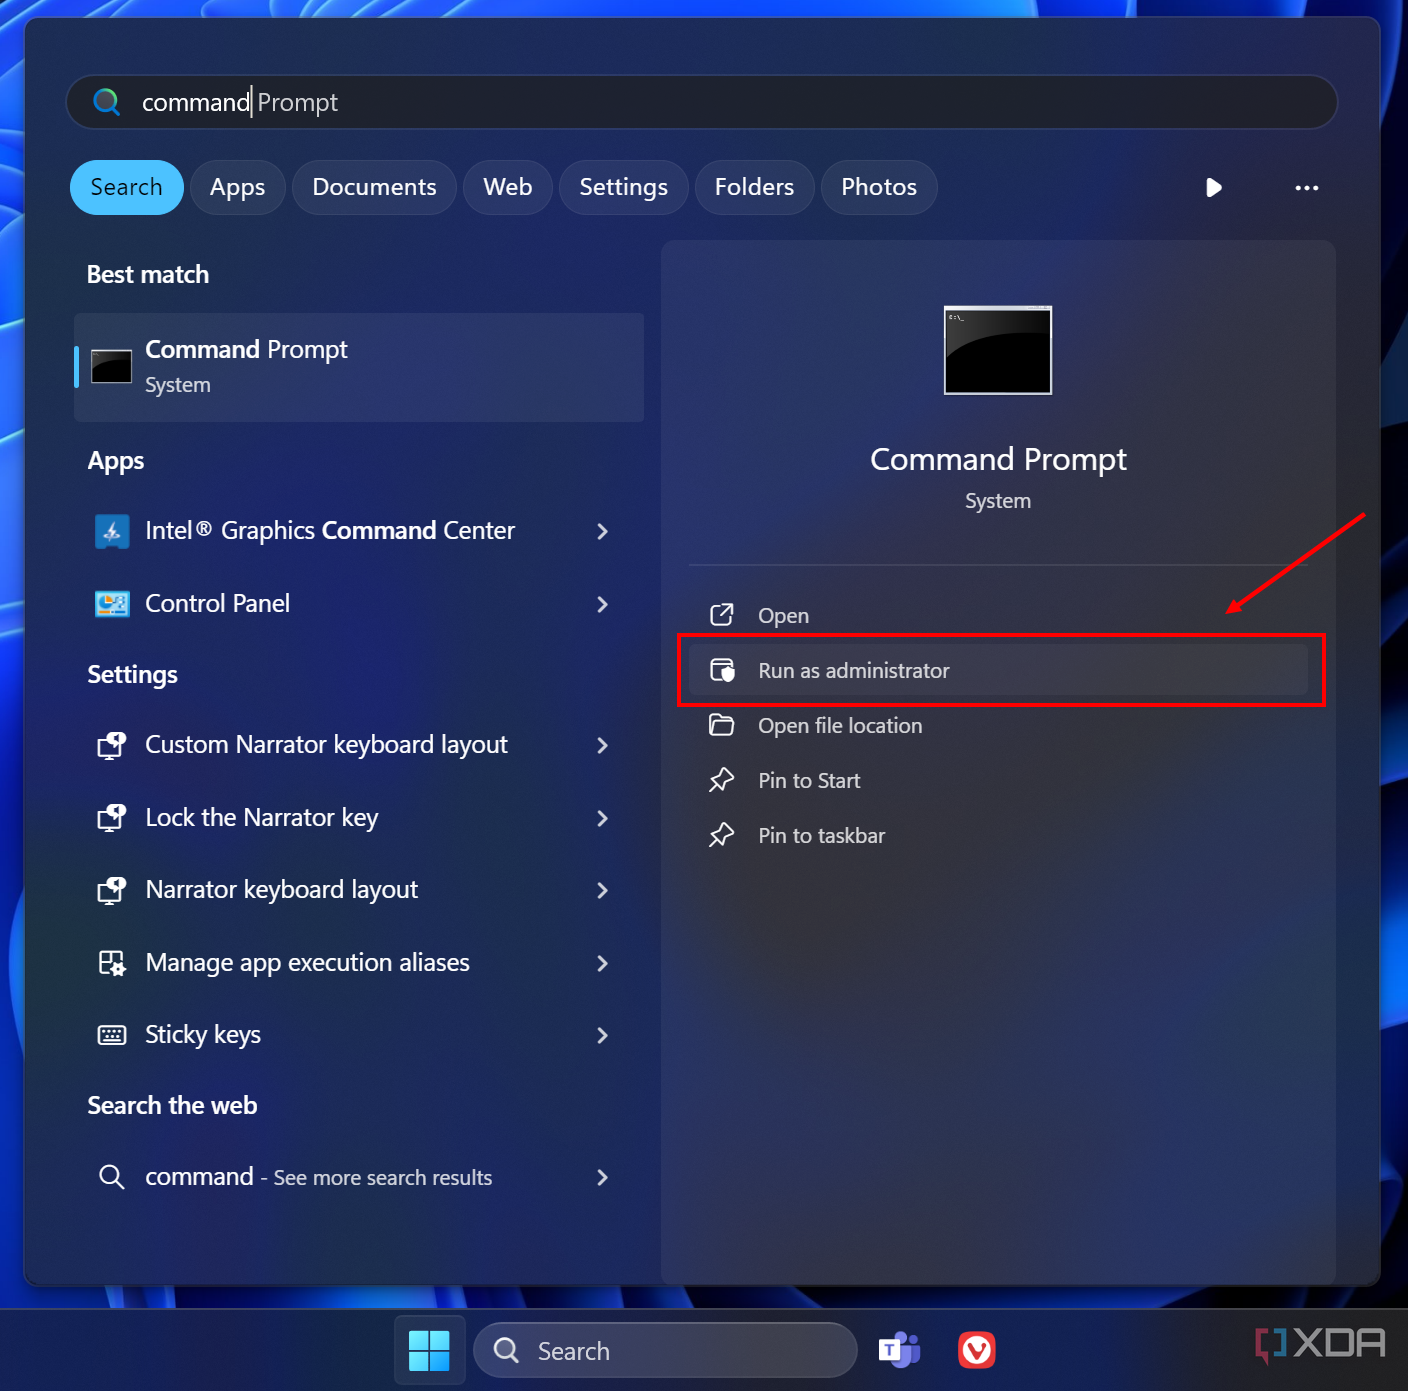
- Open the Start menu and search for Command Prompt, then choose the Run as administrator option under the main result.
You can also open a new tab in an elevated Windows Terminal window.
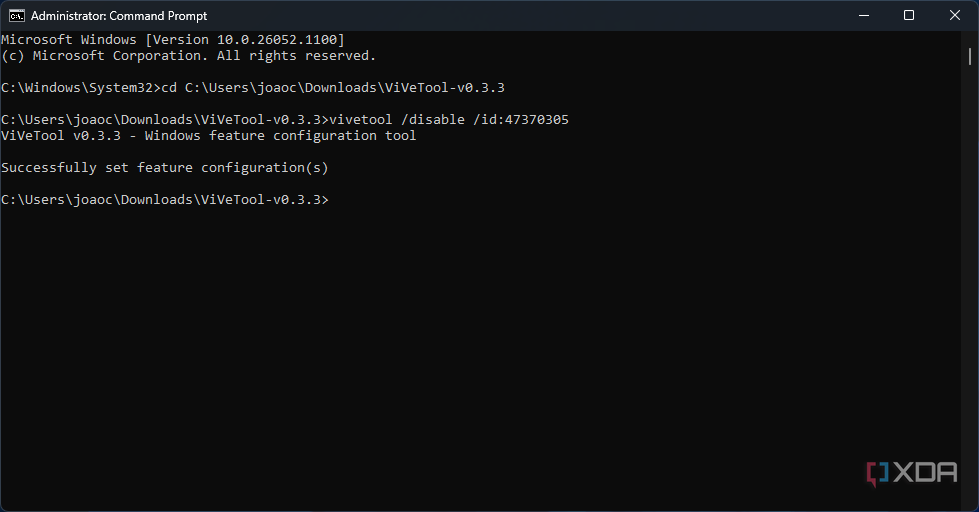
- Change the directory to the extracted ViVeTool directory. For example, in our case, the ViveTool files were extracted to C:\Users\joaoc\Downloads\ViveTool-v0.0.3, so we’ll type:
cd C:\Users\joaoc\Downloads\ViVeTool-v0.3.3
- Locate the feature ID corresponding to the feature you want to enable from the table above. Then, execute the command:
vivetool /enable /id:xxx
In our example, we’re enabling feature ID 47370305, so the result looks like this:

- If everything goes right, you should see Successfully set feature configuration as shown above.
- Close the console window and restart your computer to make the changes take effect.
- If you change your mind and want to revert the change(s), repeat the steps above and replace /enable with /disable in the commands on step 5.


You can check the status of a feature by using the following command, replacing {featureID} with the appropriate number:
vivetool /query / id:{featureID}
A feature can have one of three states, represented by a number:
- Default (0): This is the normal behavior for a particular feature.
- Disabled (1): This will completely disable the feature.
- Enabled (2): This will forcefully enable the feature.
ViVeTool is the “Swiss army knife” when it comes to the Windows feature control APIs. Apart from toggling the state of Windows features, it can query the existing feature configurations of the underlying Windows build, import/export/reset the custom configurations, and even help to identify the last known good rollback system status. To know more, open a Terminal window and run the ViveTool executable without any argument. The app will list all the commands and their usage. This includes enabling or disabling a feature, and listing the existing feature configurations.

Maria Malik is your guide to the immersive world of Virtual Reality (VR). With a passion for VR technology, she explores the latest VR headsets, applications, and experiences, providing readers with in-depth reviews, industry insights, and a glimpse into the future of virtual experiences.
