

Google’s virtual card feature is a safer way to make payments, both in-app and online. When you use this feature, a unique virtual card number replaces your physical card number. This way, when you check out, your actual payment details remain undisclosed, protecting against fraud and identity theft. Keep reading to learn how to create and use virtual cards on your go-to Chromebook or PC and phone.
How does Google’s virtual card work?
The virtual card feature gives you a new card number that overrides your physical card number when making online purchases. When you use this feature, the virtual card number, CVC, and expiration date may differ from the actual details on your physical card. For added security, your virtual card number or CVC might change for different transactions and merchants.
How to create a virtual card on your Android phone
As helpful as Google’s virtual card feature is, not everyone can use it. There are a few reasons for this. For starters, the feature is only available in the US. Additionally, your physical card needs to support the feature.
Here’s how to turn on and use a virtual card through the Chrome app:
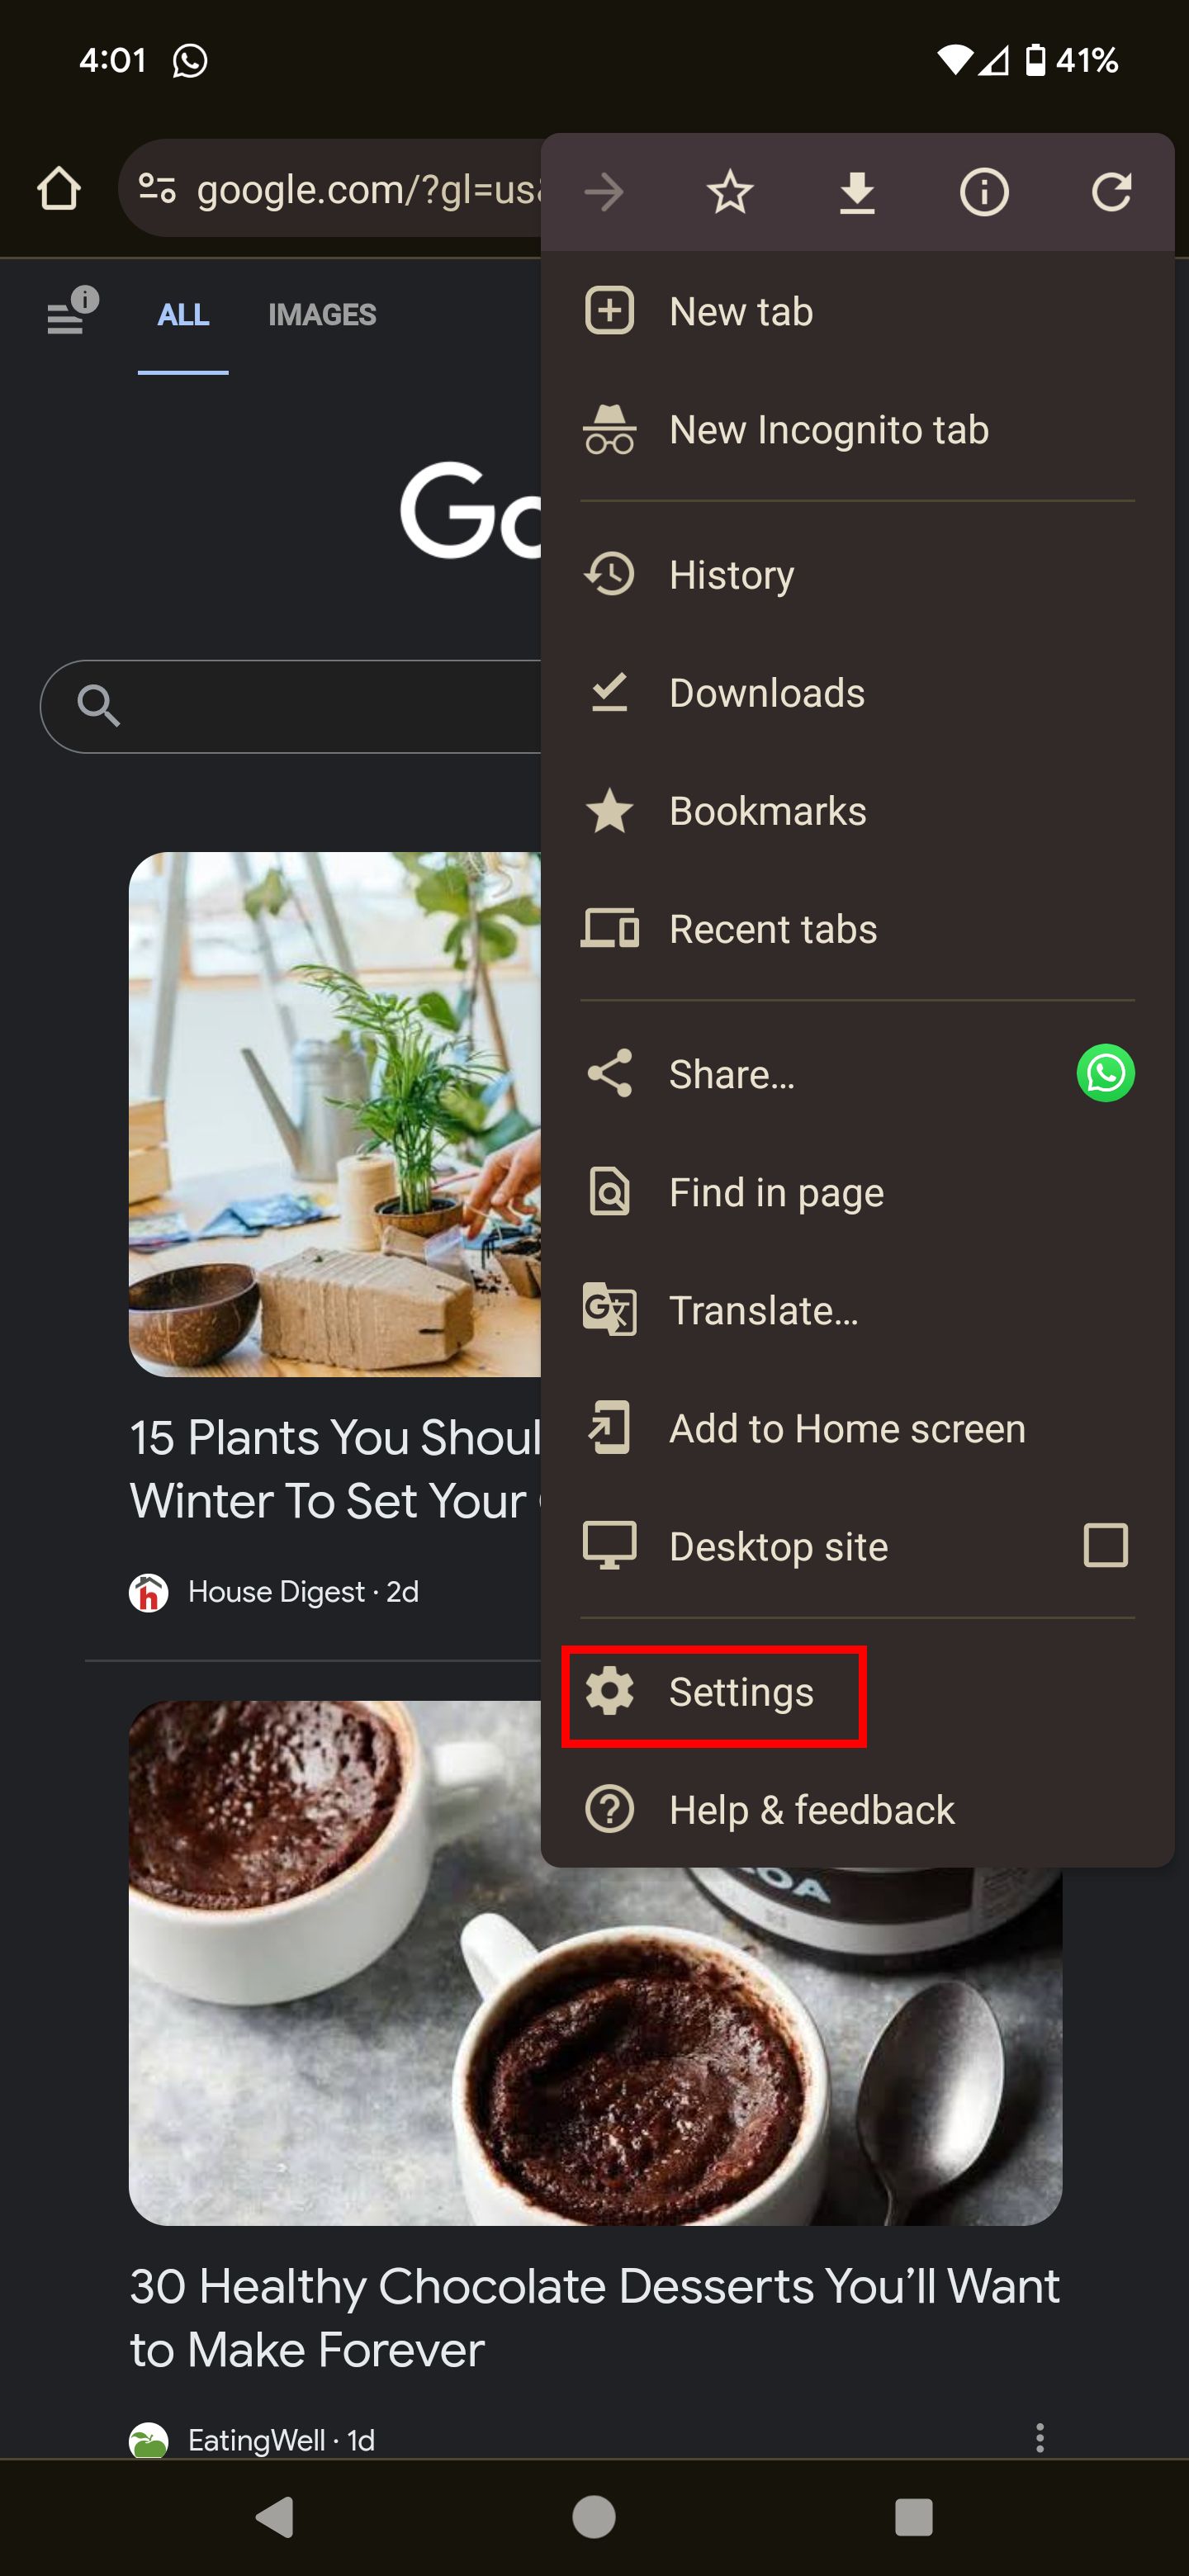
- Navigate to the Chrome app on your phone or tablet.
- Select the three-dot menu icon in the upper-right corner of the page.
- Select Settings from the drop-down menu.
- Tap Payment methods.
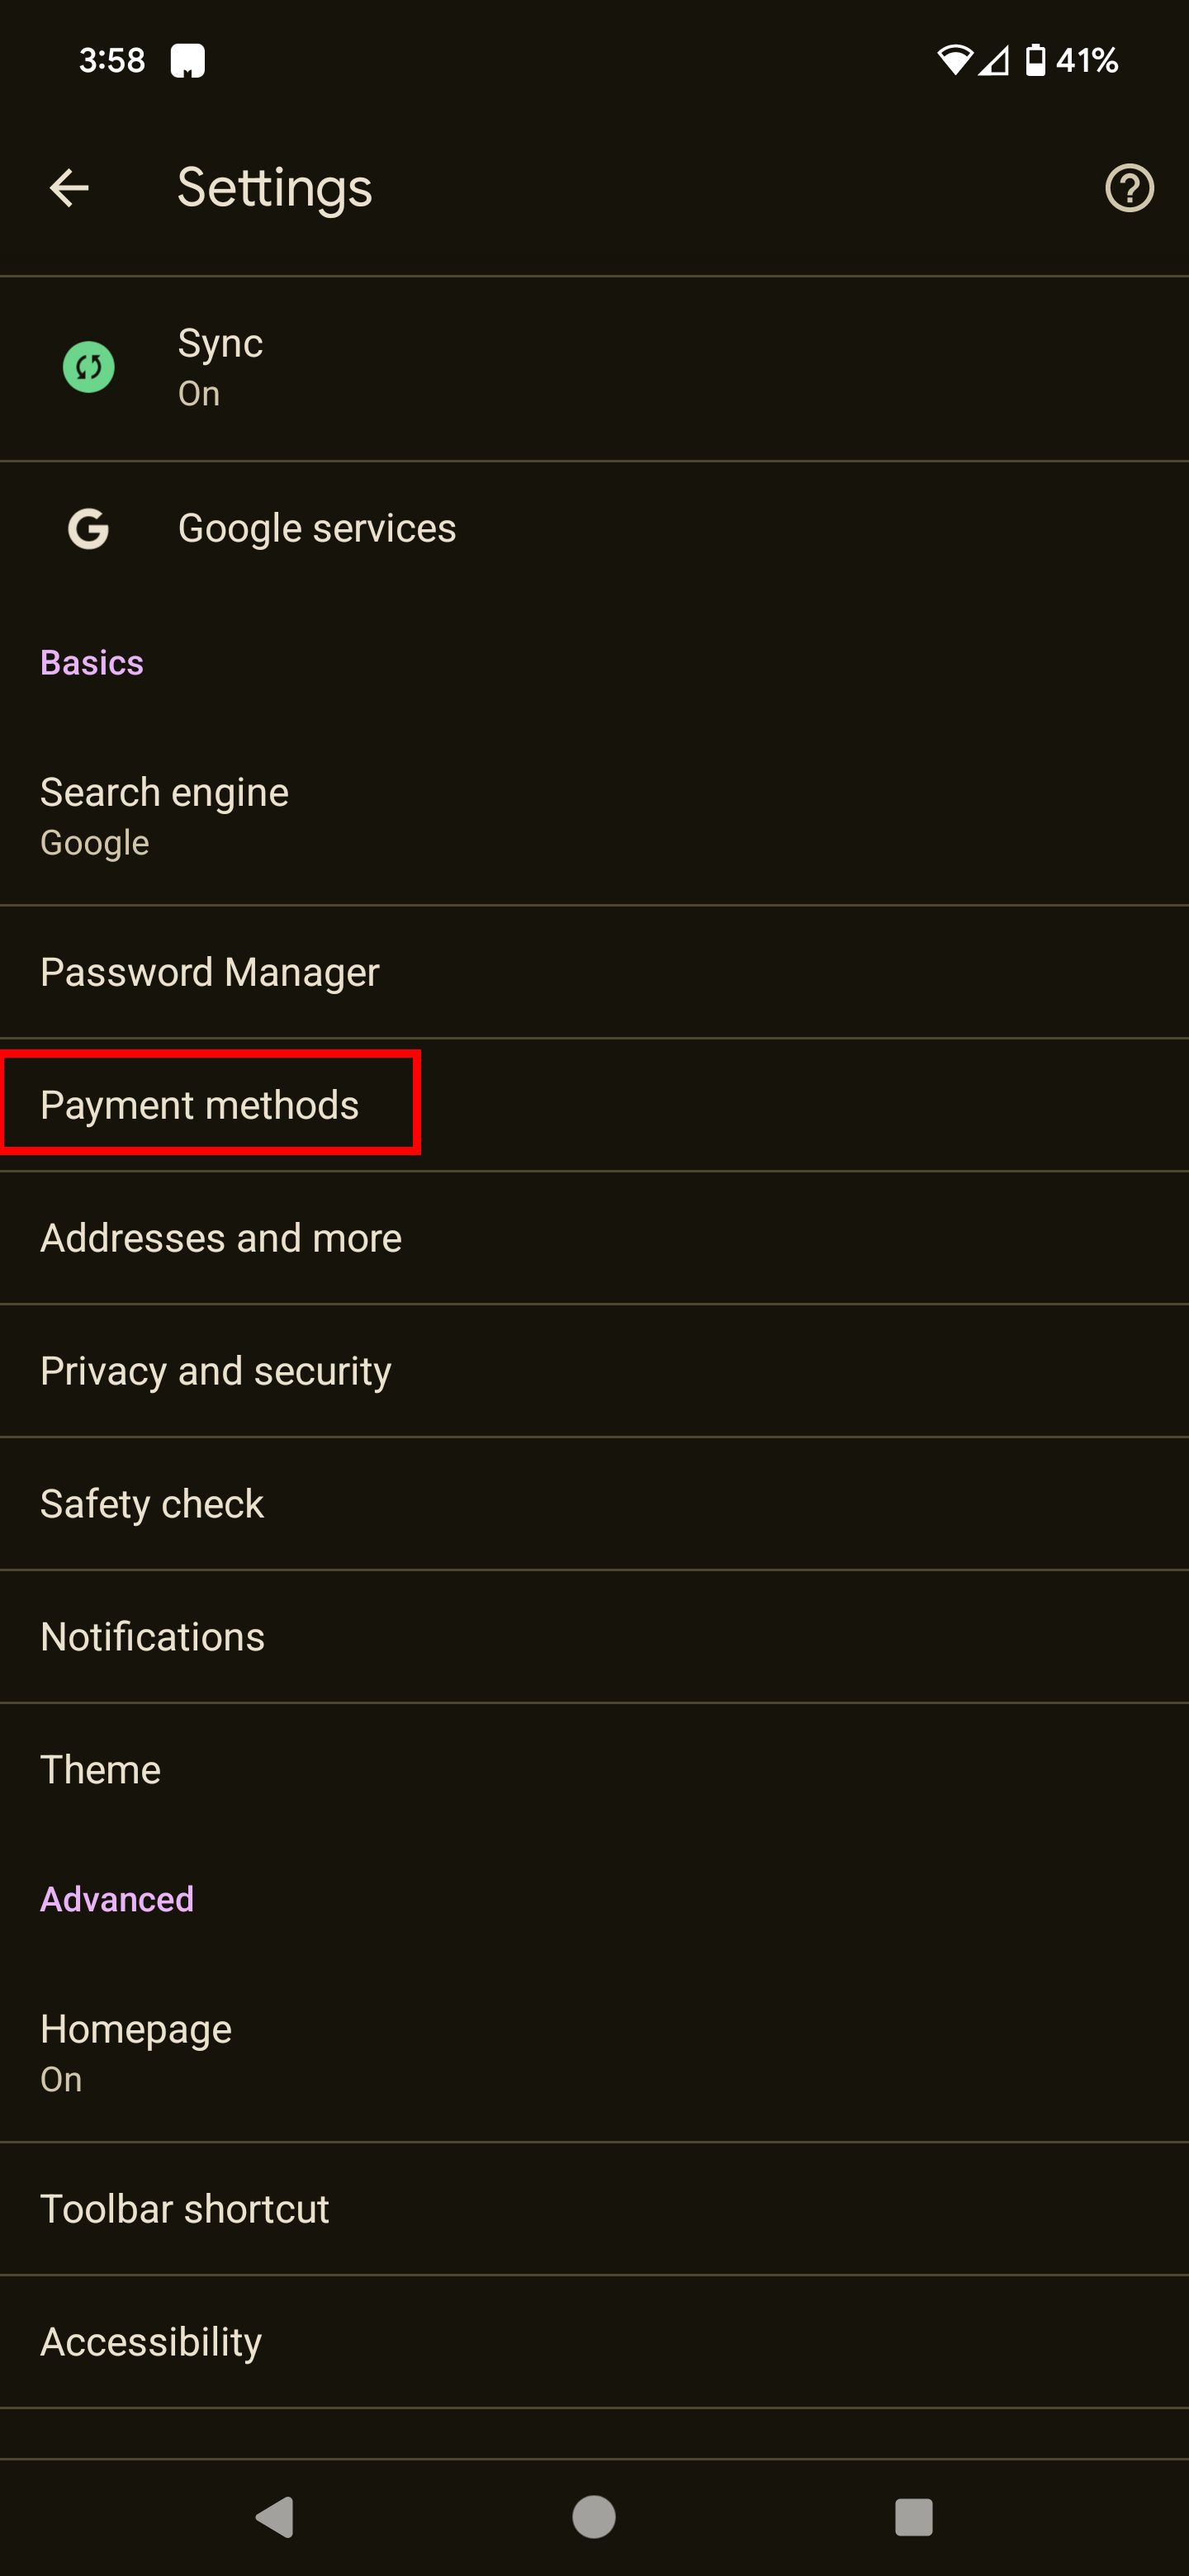
- Turn on Save and fill payment methods.
- Tap the card for which you’d like to create a virtual card.
- Select Virtual card and then tap Add.
- Read the terms of service and select Yes to proceed.


How to create a virtual card on your Chromebook or PC
Here’s how to turn on the virtual card feature in Google Chrome:
- Open the Chrome browser.
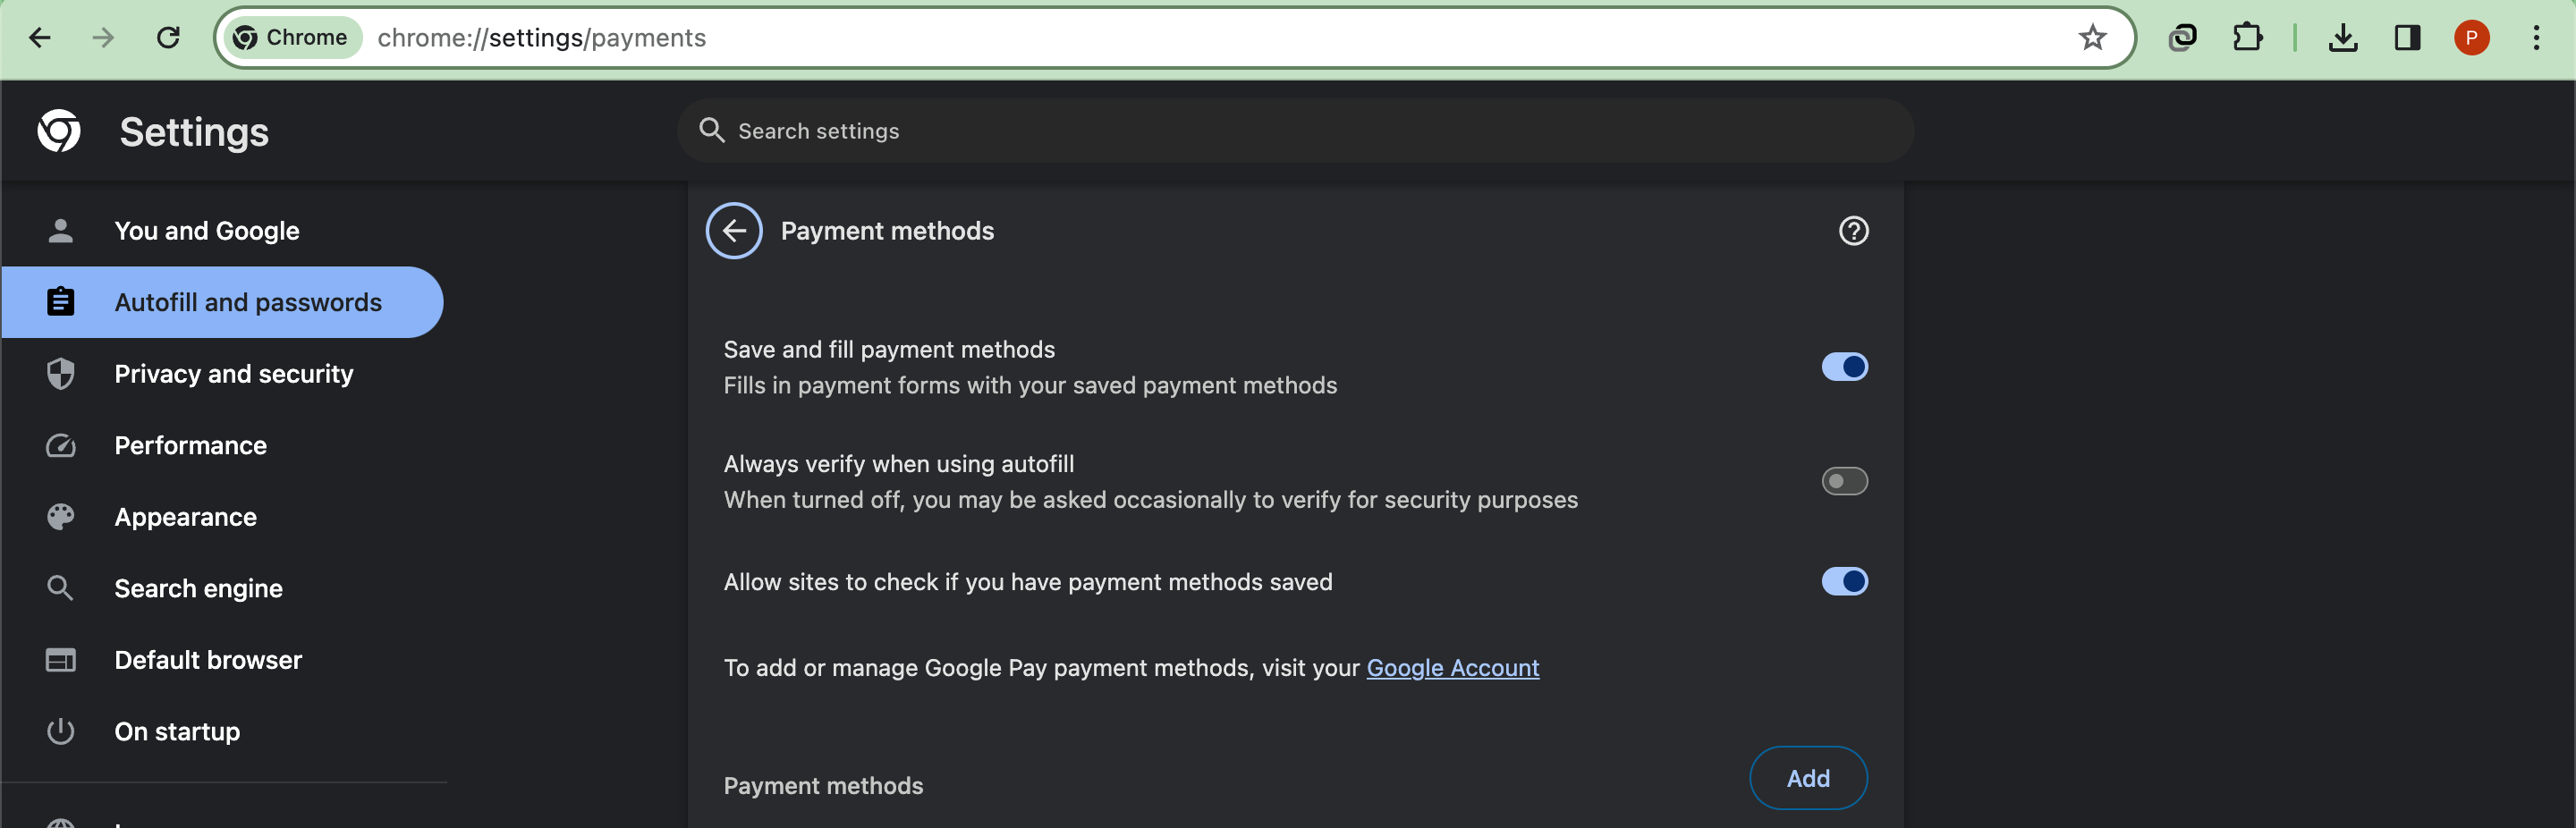
- Navigate to chrome://settings/payments.
- Turn on Save and fill payment methods and Allow sites to check if you have payment methods saved.
- Find the card for which you want to create a virtual card and click More.
- Select Turn on virtual card.
- Read the terms of service and click Yes to proceed.

You can also create a virtual card through the Google Pay website. Here’s what you’ll do:
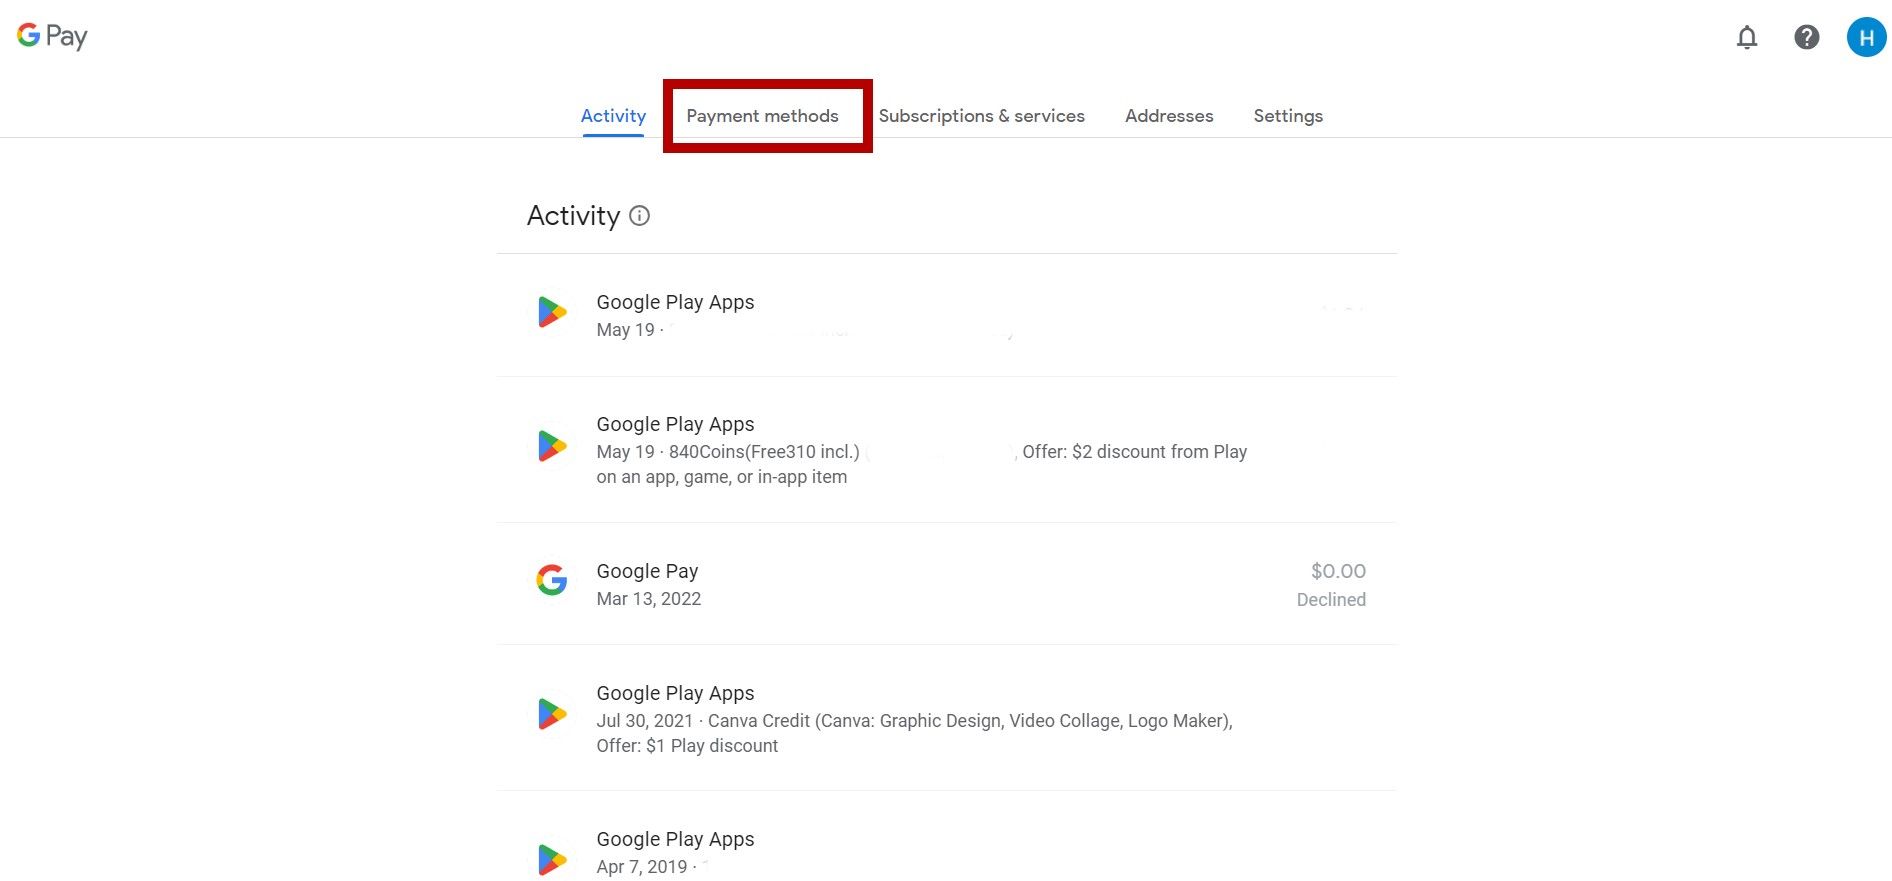
- Go to the Google Pay website at pay.google.com on your Chrome web browser.
- Navigate to the Payment methods tab at the top of the screen.
- Find the card for which you want to create a virtual number. If the card is not available, add it.
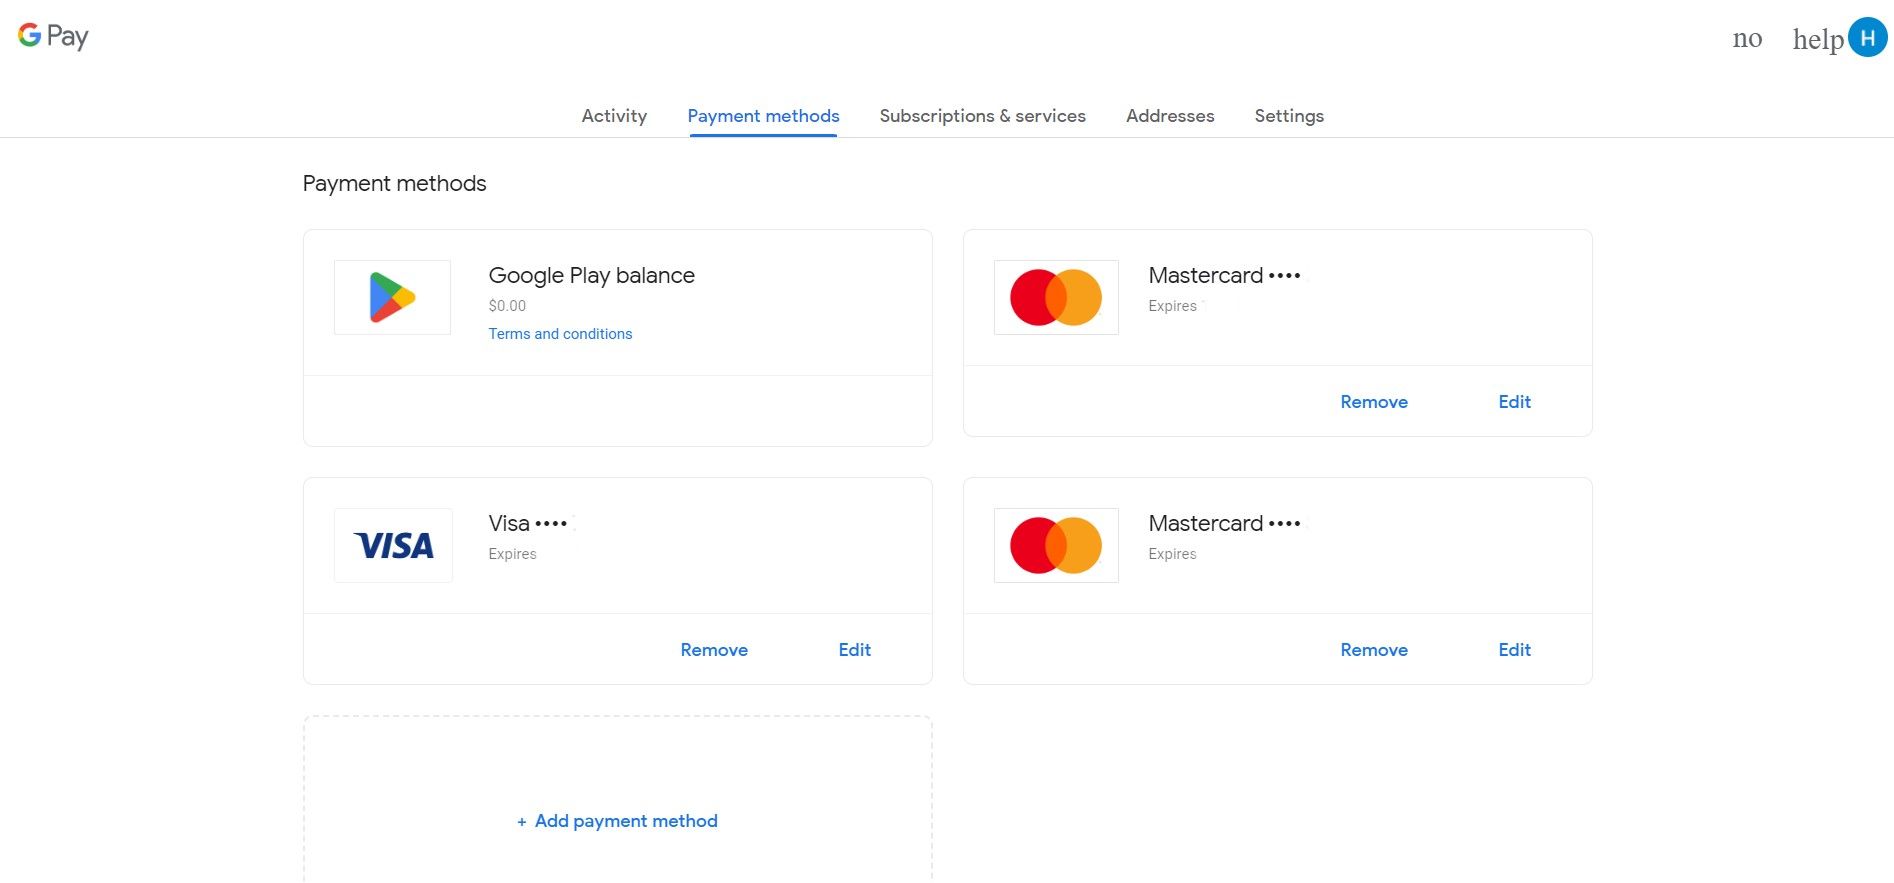
- Select Turn on virtual card. This option is only available if the card supports the feature.
- Click Turn on.
- Click Got it.


Check the details of a virtual card
After you create a virtual card, you can use it for several transactions as long as your original physical card is valid. If you need to check the virtual card details for any reason, follow these steps:
- Visit pay.google.com.
- Go to the Payment methods tab. On Android, tap the three-dot menu icon and tap Payment methods. You’ll see a list of your added cards.
- Locate the card you want to view.
- Select Manage virtual card.
- Choose View and manage virtual cards. You’re taken to the issuer’s website, where you can manage the virtual card.
Using a virtual card with Google Pay

How to add your ID to Google Wallet
Don’t worry, we’re sure the bar will accept it
After creating your virtual card, follow these steps to use it for different types of transactions.
Online purchases
You can make payments quickly, securely, and efficiently when shopping online with the Google Pay virtual card. The checkout page of a supported website brings up the option to autofill your virtual card for payment. If it doesn’t appear, follow the steps in the previous section to check the card information and input it manually.
In-app purchase
Many applications, including the Google Play Store, offer in-app purchases or subscription services. When buying on such platforms, the Google Pay option comes up. Use your virtual card to complete the process.
Google doesn’t charge fees for using its virtual card. Your bank or payment network — Mastercard, Visa, or American Express — may deduct regular transaction charges.
If you haven’t created a virtual card, checking out on a supported platform with your regular card may allow you to turn on the virtual card feature before you complete your purchase.
How to turn off a virtual card
If you choose to deactivate your card, follow these steps in the Google Chrome browser:
- Visit pay.google.com on Google Chrome.
- Select Payment methods.
- Locate the card you want to deactivate.
- Select Manage virtual card.
- Click Turn off at the bottom of the screen.
To deactivate a virtual card on your Android device, follow these steps:
- Open the Chrome app on your phone or tab.
- Navigate to Settings.
- Tap Payment methods.
- Find the virtual card you want to remove, tap More, and select Turn off virtual card.
Any virtual cards you use on Google are no longer available. You can re-add a virtual card or create a new one using the steps mentioned above.
Google says turning off a virtual card deactivates it on Google Pay, but it may be active on other platforms where you manually used it. Contact the issuer to cancel the card outside of Google Pay.
Google’s virtual cards offer a convenient and secure way to make online transactions without revealing sensitive personal information to merchants. You’ll add a physical credit or debit card that supports the feature to your account to use it.

Alex Mitchell is your go-to expert for all things mobile. With a passion for the latest smartphones, apps, and mobile innovations, Alex provides in-depth reviews, insightful analyses, and breaking news about the ever-evolving world of mobile technology. Stay connected with Alex to navigate the fast-paced realm of mobile devices.
